
We assume that you have created a developer account on Voicegain and have access to the Voicegain Web Console. If not then please follow this guide.
Create Voicegain Context
To start we suggest to create a separate Context (think of it as a workspace or a project) that you will use exclusively for the specific AudioCodes setup. This is important for two reasons:
- AudioCodes has no mechanism in its STT API to pass any ASR related settings for each request. Therefore, in Voicegain implementation of the AudioCodes STT API we rely on the ASR settings for the chosen Context that is used for Audiocodes.
- AudioCodes uses a JWT token for the authentication. In case the token is compromised you will need to generate a replacement JWT token. JWT tokens are on the Voicegain Platform generated at a Context level - each Context has its own JWT token.
Here are relevant help articles:
- Creating and managing contexts - scroll down to Contexts Section
- Creating a JWT token
Configure AudioCodes VoiceAI
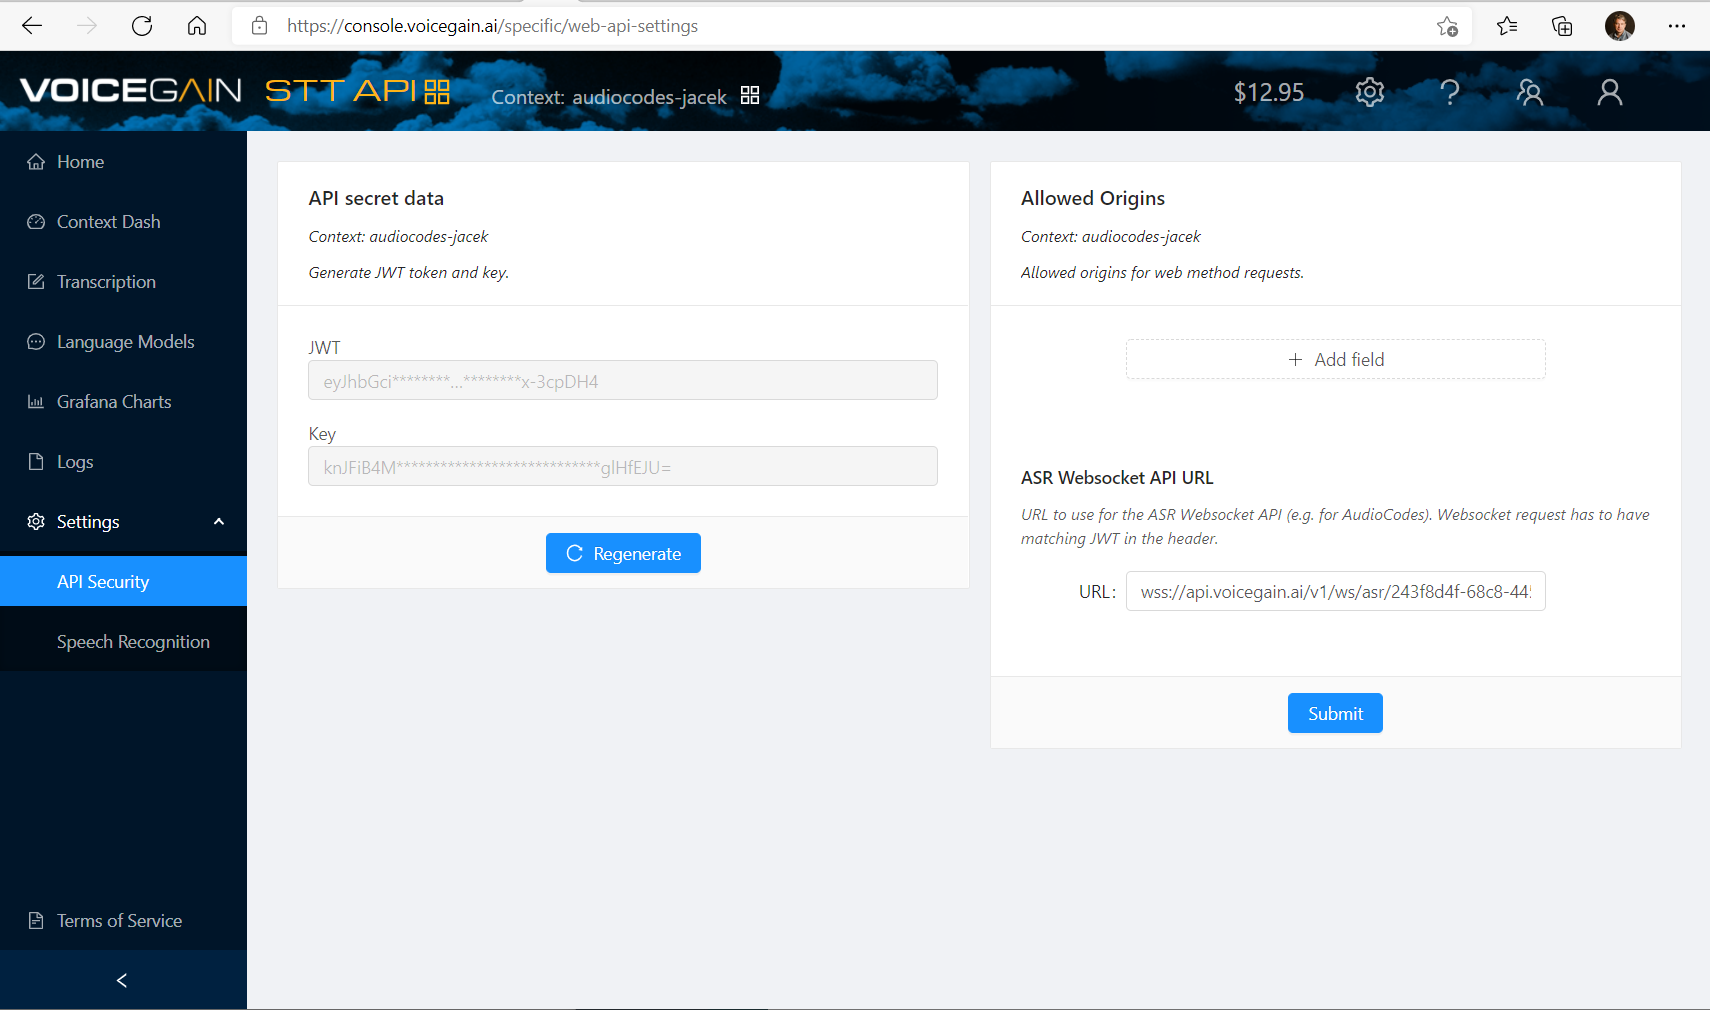
To configure AudioCodes VoiceAI you will need the already mentioned JWT token and a websocket API URL.
You can retrieve the websocket API URL by switching to the STT API mode (click on 4 orange squares icon in the header) and then going to Settings -> API Security. There you will see the ASR Websocket API URL that you will need to copy. The ASR Websocket API URL is different for each Context so for your AudioCodes configuration you will need matching JWT and Websocket API URL from the same Context.
Configure ASR Settings on Voicegain
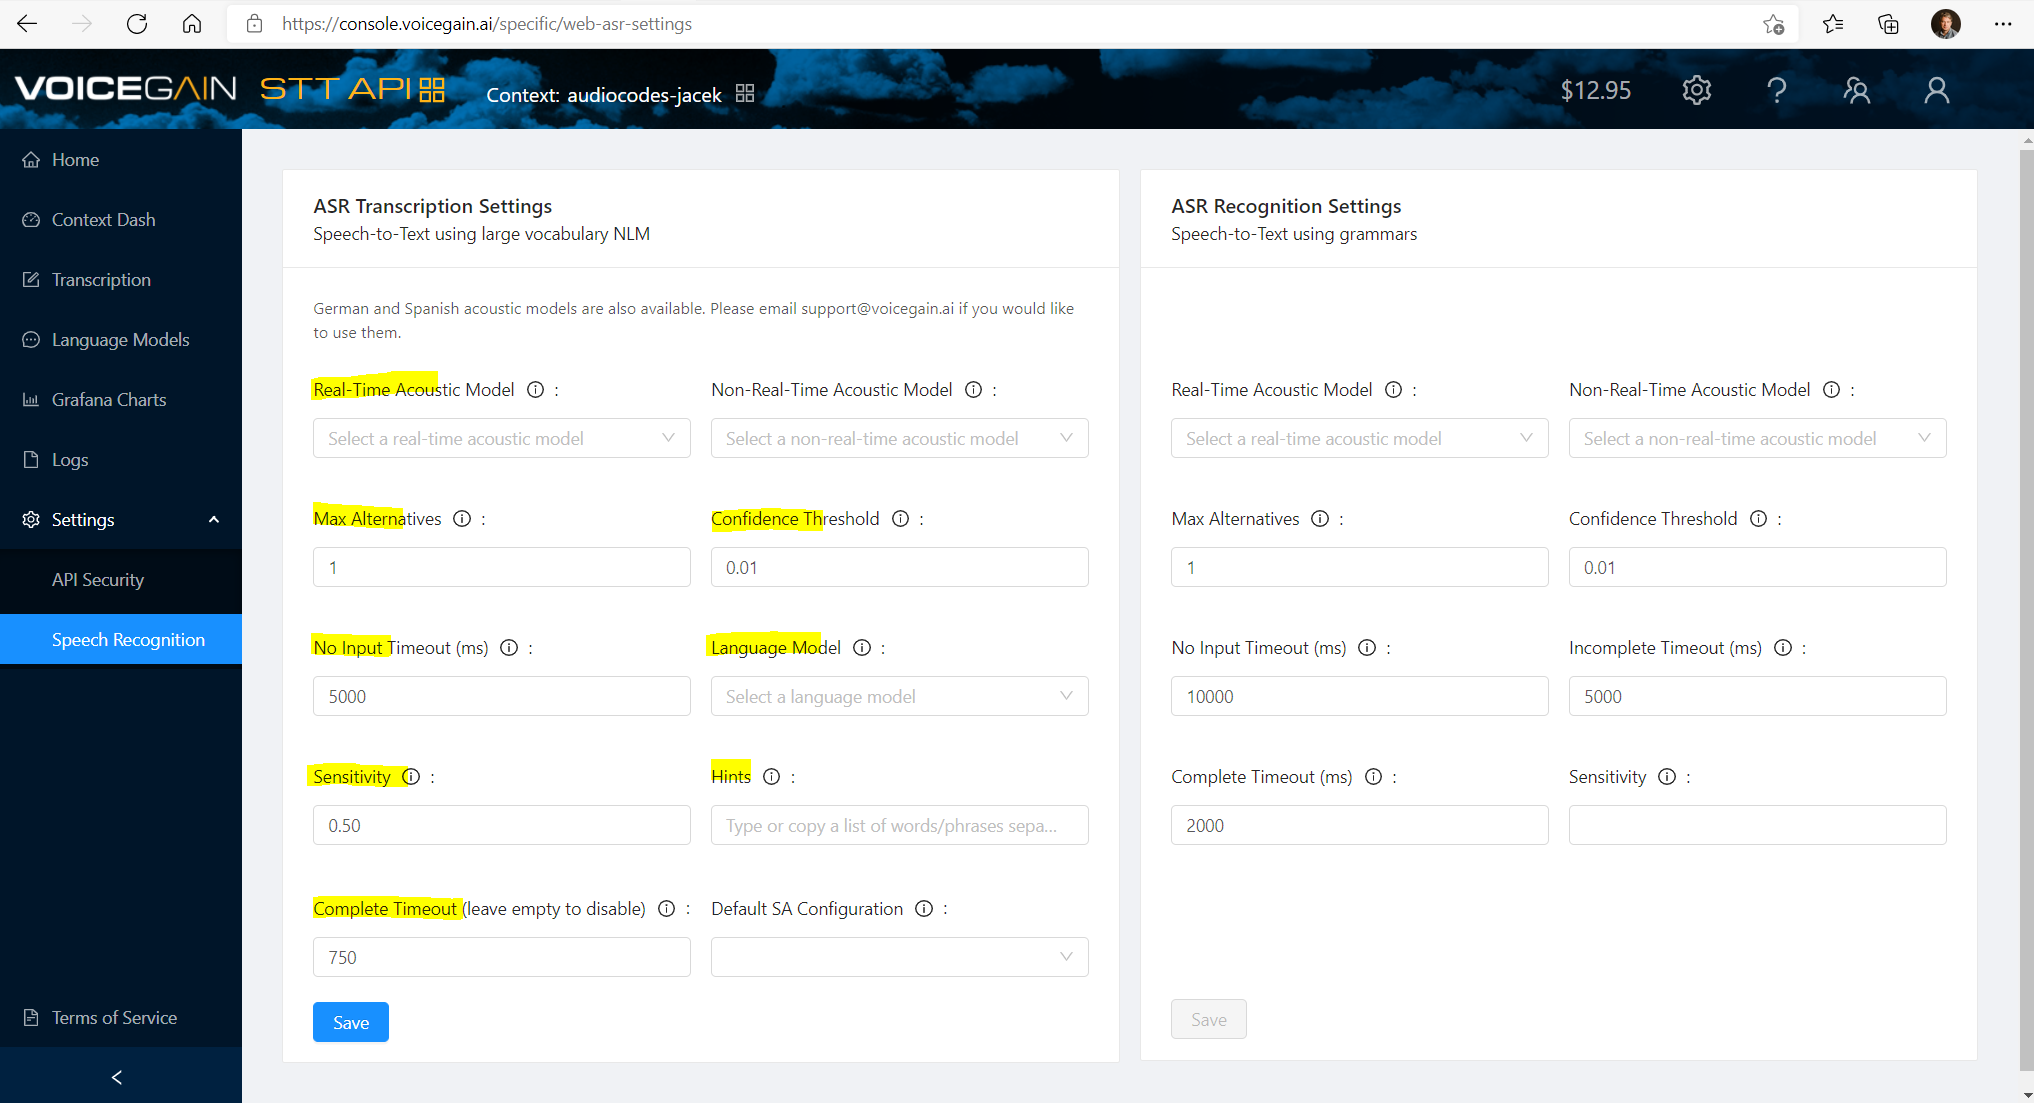
Finally, for AudioCodes you need to set the correct ASR settings under Settings -> Speech Recognition in the chosen Context:
- Real-Time Acoustic Model - generally leaving this default is fine
- Max Alternatives - for AudioCodes we leave it at 1
- Confidence Threshold - set it to a higher value if you want Voicegain to reject bad recognitions. Note that AudioCodes does pass the confidence of recognition from STT to the bot so your bot can also do rejection of bad recognitions based on low confidence value
- No Input Timeout - set it to value that is suitable for detecting no-input
- Language Model - choose Language Model that you want to use - we suggest using language models only for good quality audio
- Sensitivity - set it to a value lower than 0.5 to reject more background noise
- Hints - set the default hints - we suggest using hints only for good quality audio
- Complete Timeout - this is an important parameter and it determines utterance endpointing.
Configure Formatting
You can also set the default text formatting options. They are available at the bottom of the Settings->Speech Recognition page. Currently only one formatting option is exposed in the Web UI and it is digit formatting which returns numbers as digits instead of being spelled out as words.
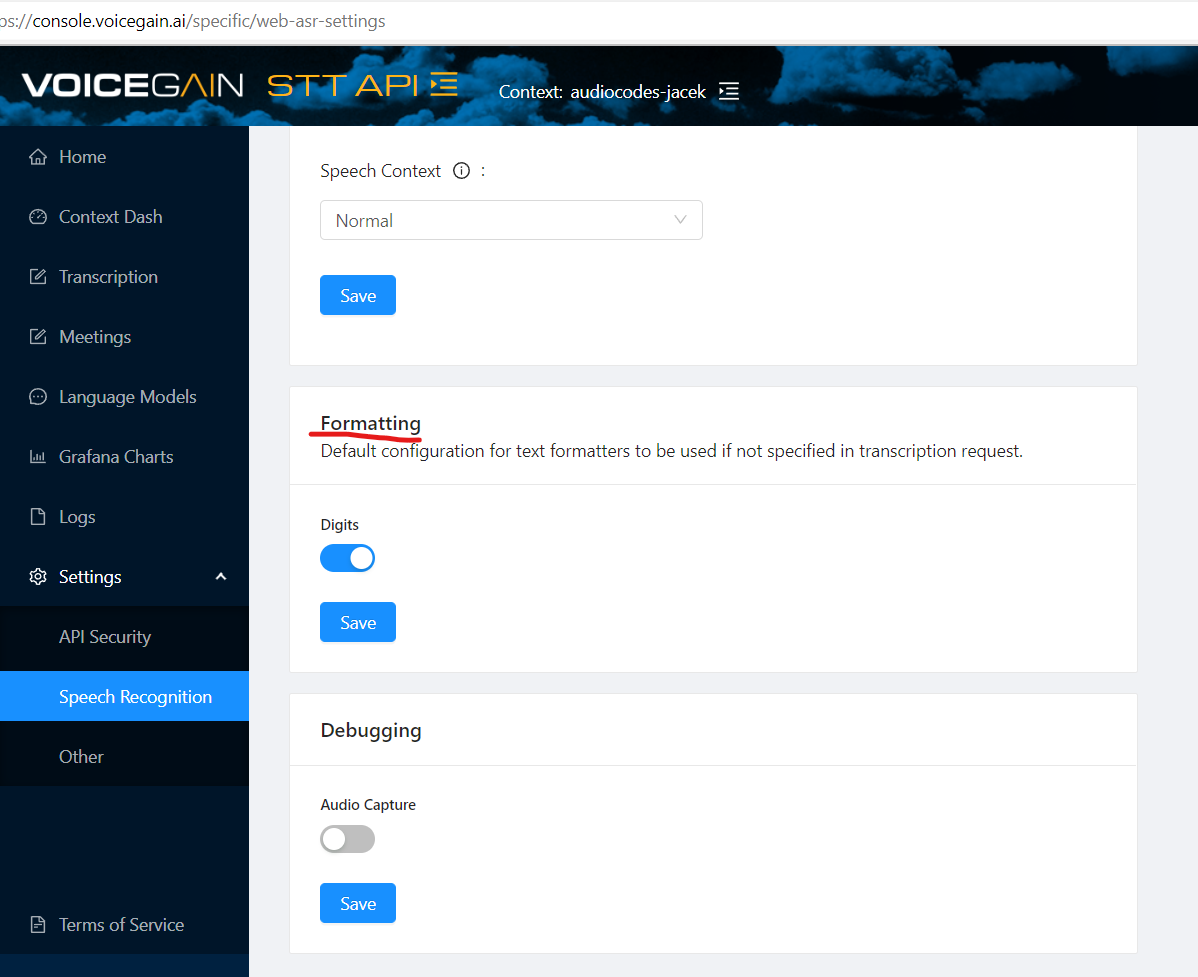
Other formatters are available for: punctuation (enabled by default), spelling (default is en-US), and profanity masking. They can be configured using the API, but upon request we can add them to the Settings in the Web UI.
Comments
0 comments
Please sign in to leave a comment.